Just been to the tech stores and managed to aquire some sheet aluminium and angle bar, rods for making my very own animatronic (im going to last longer than lego) head mech!
This will form part of my animatronic mask and eye/tail mech which i will cover in latex/silicone cover moulded from oil based clay!
Cant wait!
Monday 10 May 2010
Wednesday 5 May 2010
mk4 plastruder mod for those with issues??!!?!
javascript:void(0)
Well, actually i think i have pioneered a new mod for the plastruder!
After about a month of unsuccessful prints with my faulty plastruder, i finally took my dremel tool to it and modded it!
The issue i was having was that the idler wheel would let the filament slip sideways off of the edge, sitting nicely in the corner and failing to budge causing a faulty print.
One of the issues that originally caused this was that the 'lid' to my timing pulley which fits onto the plastruder motor came off - it fell off after about 3 days - and that was many months ago before makerbot 100 was shipped!
i needed something to stop the filament sliding off to the side and getting into the corner.
The pulley placed on the end of the motor shaft did stop this, but eventually the force of the filament trying to escape the jaws of the pulley teeth would push the bearing out. i needed a way to fix it so that this force could not push on the outside and free itself.
My idea....
well. as i originally said, my plastruder timing belt lid had come off... my idea was to dremel the rough end of the timing pulley (so the teeth were flush to the end) rotate it round, and instead of having the bearing on last, was to swap it round. The bearing would fit first onto the motor shaft, then the pulley - but rotated so the screw threads would tighten furthest away from the motor. The idea being, as the motor would force the filament down, it could not pus to the side as it would push against the thicker part of the timing pulley - which is fixed...... lest see a picture!

here is the old setup, the end of the timing pulley had come away.

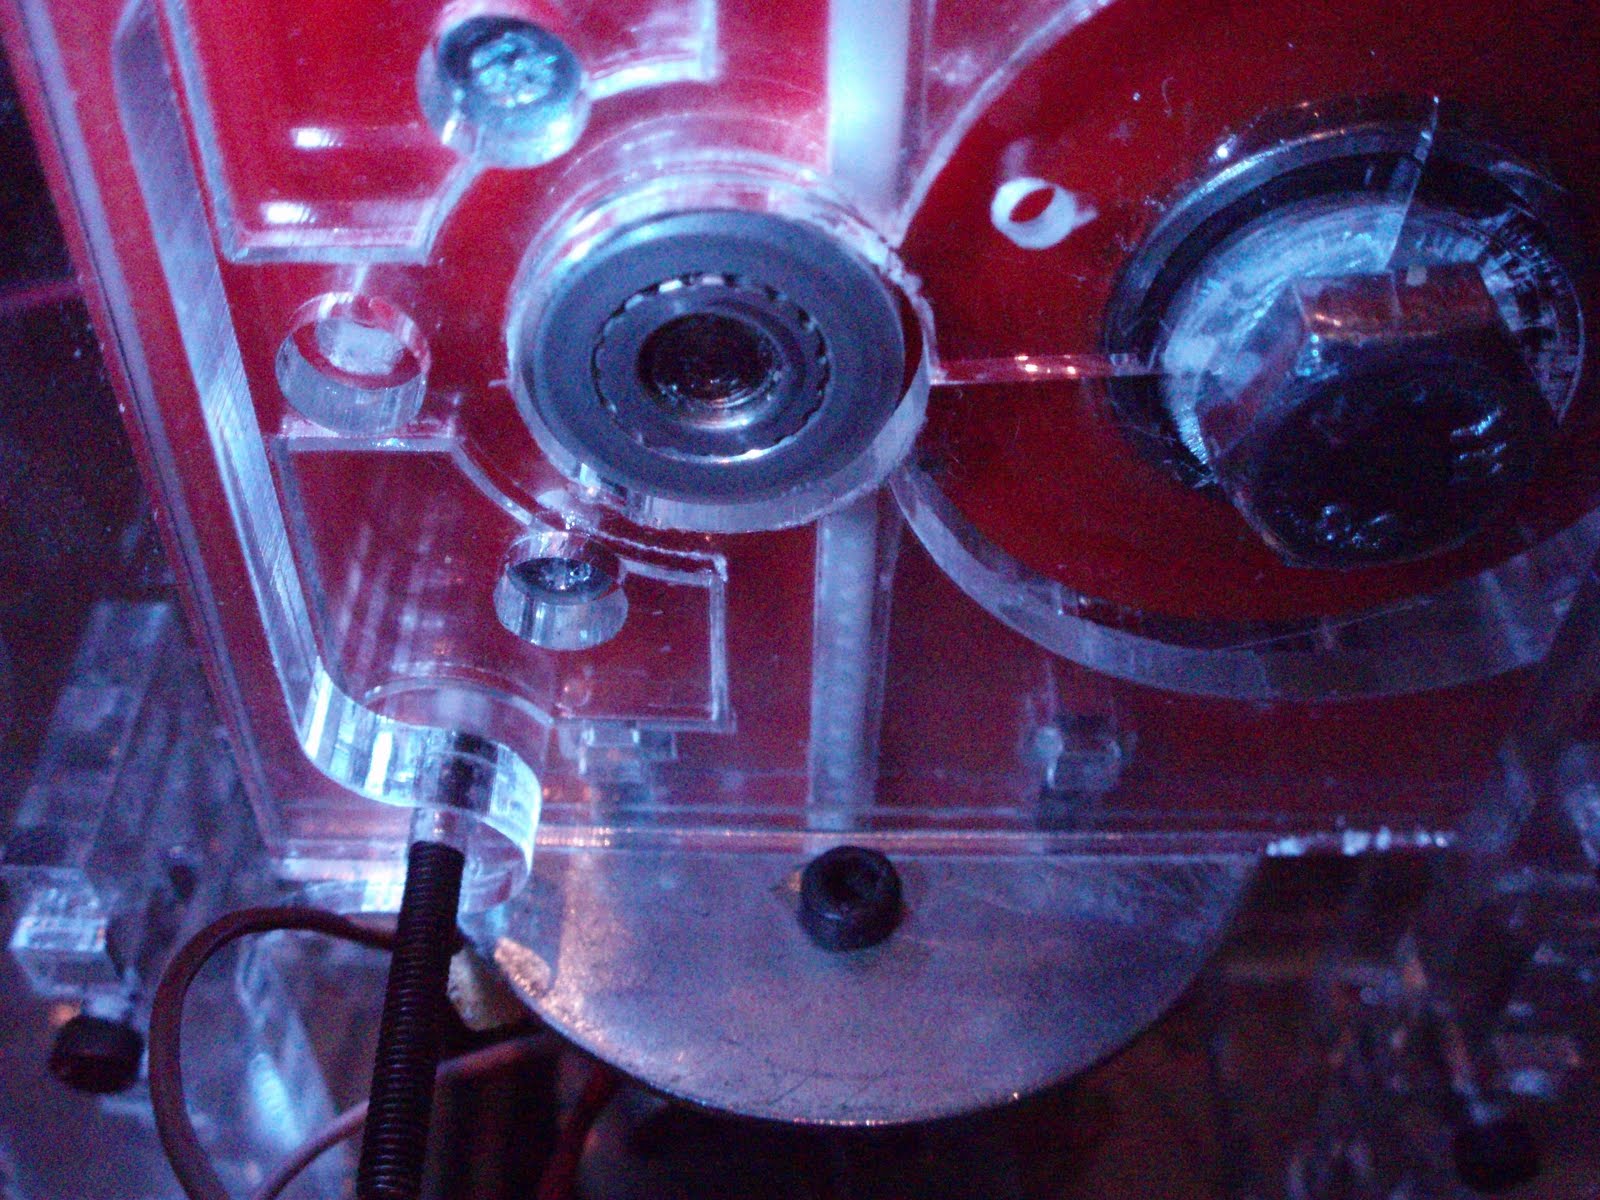
The pulley is placed on first, then the timing pulley - note i have tidied the end of the timing pulley to provide a flush flat edge - see previous photo)

In situe in the plastruder casing, the pulley and bearing fit perfectly and line up with the filament guides.

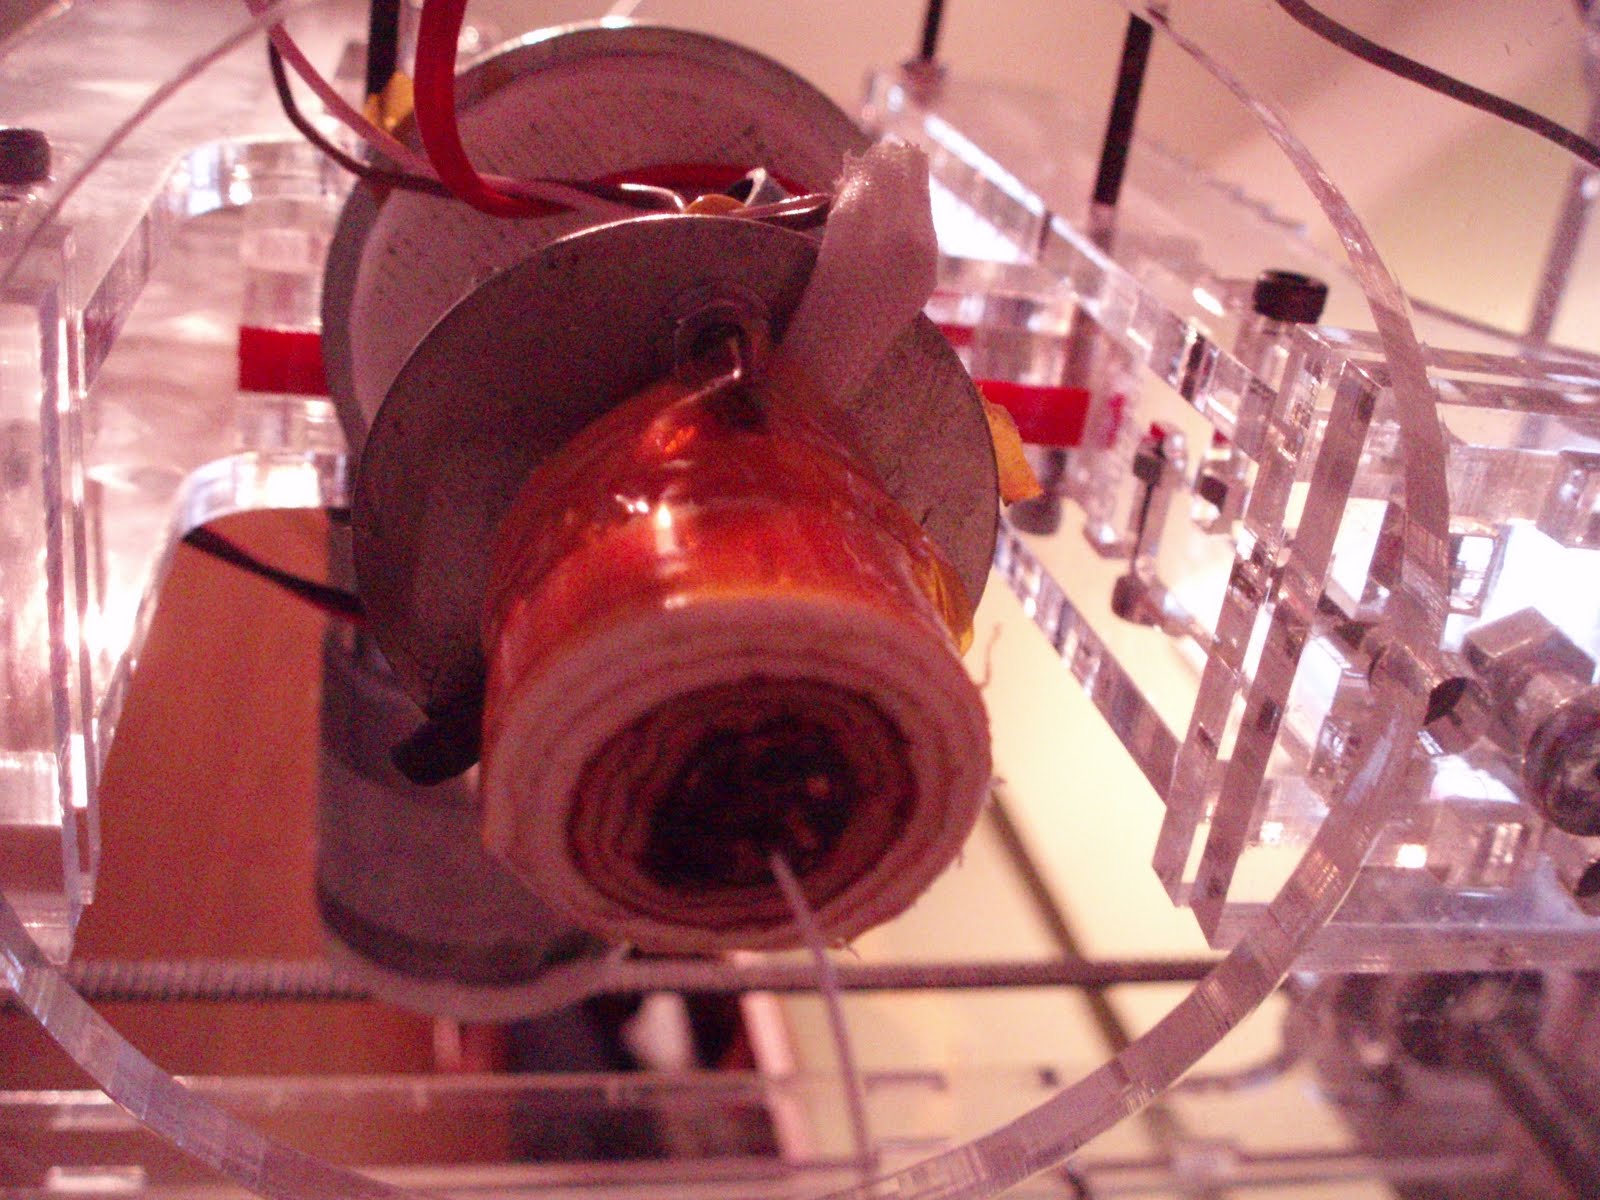
the filament is fed nicely through to the heater barrel.

hurray! filament is feeding at a great rate - motor set at 255 and no stripping of threads!
Also another mod i have added... A fan connected to the fan connector on the extruder mobo is positioned over the mosfets to keep the cooler - i will make some heatsinks but this seems alright so far!
Sadly they can be turned on/off using the fan control box on the control panel, however using the 'cool' function set in skeinforge (with values set to 0 and fan on at startup) we are able to make the software turn on the fan and leave it on for the entirety of the print and on afterward as well!

I must also add that the temperature of my heater barrel dropped always to 220, which caused some of the failed prints. i only just realised that this is a setting specified in the startup code. i have now modified this to display 240, and to remain hot at the end by modding the end.gcode file!
I have now had a successful continuous feed of abs t full pwm (255) for 10 minutes!
Maybe i can finally get to use my 12Kg coil of Black ABS!
Well, actually i think i have pioneered a new mod for the plastruder!
After about a month of unsuccessful prints with my faulty plastruder, i finally took my dremel tool to it and modded it!
The issue i was having was that the idler wheel would let the filament slip sideways off of the edge, sitting nicely in the corner and failing to budge causing a faulty print.
One of the issues that originally caused this was that the 'lid' to my timing pulley which fits onto the plastruder motor came off - it fell off after about 3 days - and that was many months ago before makerbot 100 was shipped!
i needed something to stop the filament sliding off to the side and getting into the corner.
The pulley placed on the end of the motor shaft did stop this, but eventually the force of the filament trying to escape the jaws of the pulley teeth would push the bearing out. i needed a way to fix it so that this force could not push on the outside and free itself.
My idea....
well. as i originally said, my plastruder timing belt lid had come off... my idea was to dremel the rough end of the timing pulley (so the teeth were flush to the end) rotate it round, and instead of having the bearing on last, was to swap it round. The bearing would fit first onto the motor shaft, then the pulley - but rotated so the screw threads would tighten furthest away from the motor. The idea being, as the motor would force the filament down, it could not pus to the side as it would push against the thicker part of the timing pulley - which is fixed...... lest see a picture!

here is the old setup, the end of the timing pulley had come away.

The pulley is placed on first, then the timing pulley - note i have tidied the end of the timing pulley to provide a flush flat edge - see previous photo)

In situe in the plastruder casing, the pulley and bearing fit perfectly and line up with the filament guides.
the filament is fed nicely through to the heater barrel.
hurray! filament is feeding at a great rate - motor set at 255 and no stripping of threads!
Also another mod i have added... A fan connected to the fan connector on the extruder mobo is positioned over the mosfets to keep the cooler - i will make some heatsinks but this seems alright so far!
Sadly they can be turned on/off using the fan control box on the control panel, however using the 'cool' function set in skeinforge (with values set to 0 and fan on at startup) we are able to make the software turn on the fan and leave it on for the entirety of the print and on afterward as well!

I must also add that the temperature of my heater barrel dropped always to 220, which caused some of the failed prints. i only just realised that this is a setting specified in the startup code. i have now modified this to display 240, and to remain hot at the end by modding the end.gcode file!
I have now had a successful continuous feed of abs t full pwm (255) for 10 minutes!
Maybe i can finally get to use my 12Kg coil of Black ABS!
Subscribe to:
Posts (Atom)
